240z Tail Light Gaskets
Nobody wants to smell exhaust inside their car. Here's a cheap way to prevent it.
Every car has quirks and a 240z is no exception. The aerodynamics at the rear creates a high-pressure zone. If the gaskets around your tail lights are cracked or have shrunken, the high-pressure zone can push exhaust fumes inside the cabin. Opening a window can make it worse because it creates a slight vacuum which helps draw in more of the fumes. It's stinky but depending on the amount, it can be dangerous because the exhaust contains (among other things) carbon monoxide, which can kill. The solution is to replace the gaskets but they can be pricey. In 2022 the cheapest pair I could find was $87 plus $10 shipping. Ouch. Some people have used caulking as a cheap alternative but it can be pretty messy and a nightmare if you ever need to remove the housing. Why not make your own gaskets? It's cheap and easy.
Stock Replacement Gaskets
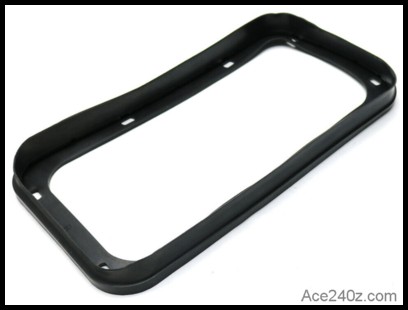 Here's what a stock gasket looks like.
It's made from thin rubber, molded to fit around the plastic housing. They work pretty well unless the tail light housing is cracked or warped, or if the rubber is old and brittle.
Here's what a stock gasket looks like.
It's made from thin rubber, molded to fit around the plastic housing. They work pretty well unless the tail light housing is cracked or warped, or if the rubber is old and brittle.
Neoprene Foam
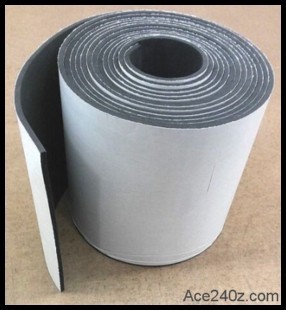 My solution was to buy some adhesive-backed neoprene foam. Neoprene is flexible but fairly rugged and is typically used for wetsuits. It's also the perfect material for gaskets because it'll fill any gaps.
It's easy to cut with a pair of scissors or a razor blade. The adhesive backing holds it tight.
This roll is a 1/4" thick, 12" wide and 24" long, and was just $20 with free shipping. That's nearly an 80% savings.
My solution was to buy some adhesive-backed neoprene foam. Neoprene is flexible but fairly rugged and is typically used for wetsuits. It's also the perfect material for gaskets because it'll fill any gaps.
It's easy to cut with a pair of scissors or a razor blade. The adhesive backing holds it tight.
This roll is a 1/4" thick, 12" wide and 24" long, and was just $20 with free shipping. That's nearly an 80% savings.
Making The Gasket
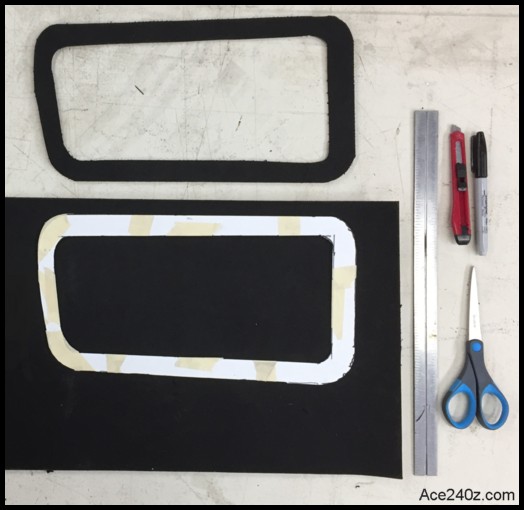 With some paper and tape I made a simple template in about 10 minutes.
On the back of the neoprene is peel-off paper covering the adhesive. Use a pen or Sharpie to trace the template on that.
The gaskets are mirror-image, so flip the template over to make the other one.
A straightedge helped make a smooth cut, but since the gasket won't been seen, scissors will work fine.
With some paper and tape I made a simple template in about 10 minutes.
On the back of the neoprene is peel-off paper covering the adhesive. Use a pen or Sharpie to trace the template on that.
The gaskets are mirror-image, so flip the template over to make the other one.
A straightedge helped make a smooth cut, but since the gasket won't been seen, scissors will work fine.
The Final Product
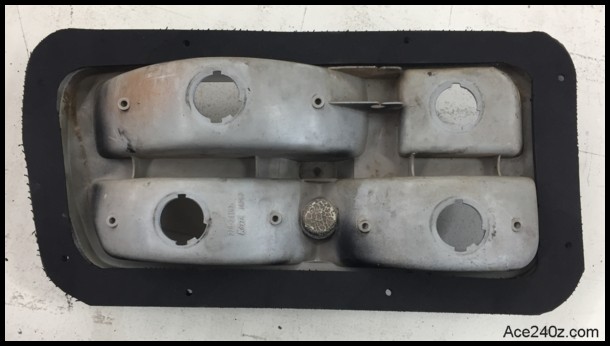 Here's how it looks attached to the tail light housing.
I did this with mine and as-of 2025 haven't smelled any fumes.
Tip 1: Pick up some plastic polish at your local parts store and use it to clean the lenses.
Tip 2: Inside the housing is a very thin layer of reflective mylar, which helps make the lights a little brighter. The mylar on yours might be faded or peeling away. I gave mine a quick sanding, then used some "chrome" rattle-can paint to restore the mirror finish. Worked great.
Tip 3: While you have everything apart, why not replace the incandescent bulbs with LED versions?
Here's how it looks attached to the tail light housing.
I did this with mine and as-of 2025 haven't smelled any fumes.
Tip 1: Pick up some plastic polish at your local parts store and use it to clean the lenses.
Tip 2: Inside the housing is a very thin layer of reflective mylar, which helps make the lights a little brighter. The mylar on yours might be faded or peeling away. I gave mine a quick sanding, then used some "chrome" rattle-can paint to restore the mirror finish. Worked great.
Tip 3: While you have everything apart, why not replace the incandescent bulbs with LED versions?